Building your own DIY HDMI to USB-C adapter is a rewarding and practical project that allows you to repurpose old hardware for data transfer and storage. Whether you’re setting up a home theater system, presenting on a projector, or simply need a portable solution to connect your devices to HDMI displays, this DIY USB-C to HDMI cable can be a cost-effective solution.
In today’s tech-driven world, USB-C to HDMI cables are essential for connecting devices such as laptops, smartphones, and tablets to high-definition displays. In this guide, we’ll take you through the process of building your own USB-C to HDMI cable. From wiring the connectors to testing the cable for optimal performance, we’ll cover everything you need to know to create a high-quality adapter. Let’s dive into the materials and tools required, step-by-step instructions for wiring, tips for signal integrity, and troubleshooting advice.
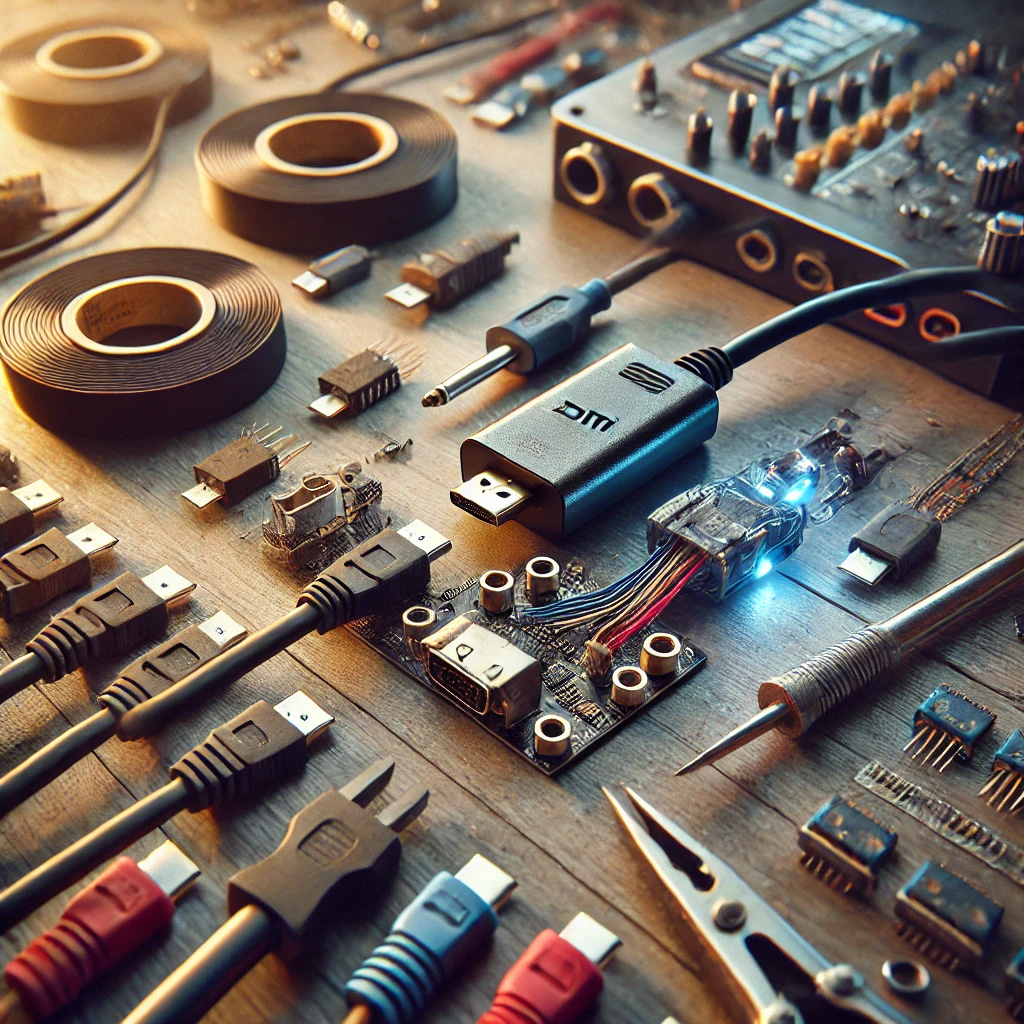
Materials and Tools You’ll Need
Before you begin your project, gather the following materials and tools:
Materials:
- HDMI Male Connector – The connector that will plug into the HDMI output device (like a laptop, console, or DVD player).
- USB-C Male Connector – The connector that will plug into your USB-C device (like a laptop, tablet, or smartphone).
- HDMI Cable – A standard HDMI cable to connect the HDMI male connector to the adapter.
- USB-C Cable – A high-quality USB-C cable for connecting to the USB-C device.
- Soldering Iron and Solder – For attaching the wires to the pins of the connectors.
- Heat Shrink Tubing – To insulate and protect the soldered wires.
- Electrical Tape – For additional insulation.
- Wire Strippers – To expose the wires for soldering.
- Multimeter (Optional) – For testing connections.
Tools:
- Soldering Iron Stand – To hold the hot soldering iron safely.
- Cable Cutter – For cutting cables to your desired length.
- Soldering Flux – Helps the soldering process and improves the quality of the connections.
- Tweezers – For handling small components.
Step-by-Step Guide: Wiring Your HDMI to USB-C Adapter
Now that you’ve gathered your materials, let’s dive into the step-by-step process for wiring your HDMI to USB-C adapter.
1. Prepare the HDMI Cable
Start by cutting the HDMI cable to the length you need, leaving enough wire to work with. Carefully strip back the outer insulation of the HDMI cable to expose the internal wires. Inside, you’ll find several smaller wires, including video, audio, and ground wires. For this project, focus on the video and ground wires.
2. Prepare the USB-C Cable
Similarly, cut and strip the USB-C cable. You’ll be using the data and ground wires for the connection. Since USB-C supports a variety of data protocols, we will focus on those that handle video signals. For video, you’ll need to ensure that the DisplayPort data lines on the USB-C connector are correctly matched with the video pins on the HDMI connector.
3. Identifying Pinouts
You’ll need to understand the pinout mapping for both HDMI and USB-C connectors. The HDMI connector has 19 pins, but you’ll mainly focus on:
- Pins 1-5 (for video and audio signals)
- Pins 17-19 (for ground)
USB-C uses 24 pins, and you’ll mainly use the DisplayPort lanes and ground. Refer to pinout diagrams for each connector to ensure you’re soldering the right wires to the right pins.
4. Soldering the Wires
Once you’ve identified the pins:
- Solder the video wires from the HDMI side to the corresponding video pins on the USB-C connector.
- Solder the ground wire to the ground pins on both the HDMI and USB-C connectors.
When soldering, be cautious not to overheat the components or cause damage to the wires. If you’re unsure about which wire goes where, it’s always a good idea to check the pinout diagrams for each connector type to make sure everything is in the right place.
5. Insulate and Secure the Wires
After soldering, you need to insulate the soldered areas to avoid short circuits. Use heat shrink tubing to cover the exposed solder joints. Once applied, use a heat gun to shrink the tubing into place, providing a secure, insulated connection.
For additional protection, you can also wrap the wires with electrical tape to prevent any accidental exposure and ensure durability.
6. Completing the Cable
At this point, your HDMI to USB-C adapter should be nearly complete. Double-check your wiring and make sure that everything is connected correctly and insulated. If you’ve used heat shrink tubing, ensure that it’s fully shrunk and secure.
Now, your adapter is ready for testing.
Tips for Optimizing Signal Integrity
When making a USB-C to HDMI cable, it’s essential to optimize for the best possible signal quality:
- Use Shielded Cables: Choose shielded USB-C and HDMI cables to minimize electromagnetic interference (EMI), which can degrade the quality of the video signal.
- Minimize Cable Length: Shorter cables will maintain signal integrity better than long cables. Keep the cable length as short as possible to prevent signal loss or degradation.
- Choose High-Quality Connectors: Select gold-plated connectors to improve the reliability and quality of the connection. Gold plating resists corrosion and ensures a better signal transfer.
Testing the HDMI to USB-C Cable
Once the adapter is fully assembled, it’s time to test it:
1. Testing the Cable
Plug the HDMI end of the cable into a source device (such as a laptop, gaming console, or DVD player). Then, plug the USB-C end into the USB-C input device (such as a laptop, tablet, or USB-C monitor).
2. Check for Signal
You should see the connected device output on the USB-C display or device. If you don’t see anything, double-check the wiring to ensure that the data and ground lines are connected correctly. Make sure your device is set to the correct input.
3. Troubleshooting
- No Signal: If there’s no display output, ensure that the video pins are correctly connected between the HDMI and USB-C ends. Also, verify that your device supports video output over USB-C.
- Poor Image Quality: If the signal is weak or the image is distorted, there may be issues with the cable quality, soldering, or signal interference. Try using a higher-quality HDMI cable or adjust the resolution settings on your device.
- Flickering or Artifacts: Check your grounding wire connection. If there’s insufficient grounding, the signal might not be stable, leading to flickering or artifacts on the display.
Cost-Effectiveness and Comparison to Pre-Built Adapters
Building your own HDMI to USB-C adapter can save you money compared to purchasing a pre-built one, but it’s important to weigh the costs and benefits:
- Cost Savings: A pre-built HDMI to USB-C adapter may cost $15 to $30, while the materials for a DIY version can be much cheaper, often totaling less than $10. The key is purchasing high-quality components that won’t compromise performance.
- Customization: A DIY adapter allows you to customize the length and materials, which can give you better flexibility for specific use cases, such as a custom-length cable for a projector.
- Convenience: Pre-built adapters are ready to use out of the box, offering plug-and-play functionality. If you need a quick solution, a pre-built adapter may be more convenient than building one yourself.
Alternative Methods for Building an HDMI to USB-C Adapter
If soldering and assembling the components seems too complicated, you can look into ready-made HDMI to USB-C adapter boards that come with pre-soldered components. These boards simplify the process by eliminating the need for manual soldering. You only need to connect the cables and enclose them.
Additionally, USB-C to HDMI adapters are available on the market that come with built-in chips for video signal conversion. These adapters offer a plug-and-play solution without needing to build anything yourself.
Troubleshooting Advanced Issues
Even with a well-made DIY HDMI to USB-C adapter, you might run into some advanced issues related to signal quality or device compatibility. Here are some common problems and their solutions:
1. No Signal on the Display
One of the most common issues is the adapter not transmitting any signal to the connected display. Here’s how to troubleshoot:
- Check the Pinout Connections: Ensure that the video pins on the HDMI side are properly connected to the data pins on the USB-C side. Any loose or improper connections can prevent signal transfer.
- Check Device Settings: Ensure the source device (laptop, smartphone, etc.) is set to output the correct resolution and refresh rate to the USB-C connection. Sometimes the device may not automatically detect the correct display output.
- Check for Power Supply Issues: HDMI to USB-C adapters often require a separate power supply to support video signal conversion. Make sure the adapter is receiving power through either a USB port or an external power supply.
2. Poor Image Quality or Distorted Video
If your display shows a distorted or blurry image, it may be due to poor signal transmission or insufficient grounding.
- Use High-Quality Cables: Low-quality HDMI or USB-C cables can introduce noise or degrade the signal. Opt for high-quality cables that are shielded to minimize interference.
- Check for Grounding Issues: Inadequate grounding can cause flickering or artifacts. Ensure that the ground wire is properly connected and not loose or damaged.
- Adjust Resolution Settings: Make sure the resolution on the source device matches the capabilities of the display. Some devices may default to lower resolutions that your adapter may not support.
3. Compatibility with Older Devices
While USB-C is becoming the new standard, older devices may still be using HDMI 1.4 or earlier versions, which may cause compatibility issues with your DIY adapter.
- Upgrade the HDMI Cable: If you’re using an older HDMI cable, it might not support higher video standards (such as 4K resolution). Consider upgrading to an HDMI 2.0 or 2.1 cable, which supports higher resolutions and refresh rates.
- Check Device Specifications: Older laptops and smartphones may not support DisplayPort over USB-C, which is required for video output. Be sure to verify that your device supports this feature.
- Use an Active Adapter: Some older devices require active adapters with built-in chips to convert signals properly. If you’re using a passive adapter, this could be the root of the compatibility issue.
4. Audio Not Syncing with Video
Another common issue is the audio not syncing with the video output, especially when using a DIY adapter.
- Check Audio Output Settings: Some devices may output audio through a separate channel, which could be causing the sync issue. Adjust the audio output settings on the source device to ensure that the audio is being routed through the HDMI signal.
- Test with a Different Device: Test the adapter with a different HDMI device to rule out compatibility issues. If audio sync works with another device, the issue may lie with the original device’s settings or output format.
5. Limited Resolution or Frame Rate Support
Some users may find that their DIY HDMI to USB-C adapter only supports limited resolutions or frame rates, such as 1080p instead of 4K.
- Check Adapter Specifications: Ensure that the USB-C port on your device supports high-resolution output. Some older devices or budget models may not support higher resolutions like 4K.
- Test with Multiple Displays: Try using the adapter with different displays to see if the issue persists. Some displays may not support higher resolutions or frame rates, which could be limiting the adapter’s performance.
Wrapping Up Your DIY HDMI to USB-C Adapter Project
Building a DIY HDMI to USB-C adapter is a practical and educational project for anyone looking to create a custom solution for connecting devices with HDMI outputs to USB-C-enabled displays. By following this guide and applying attention to detail, you can create a reliable adapter that suits your needs, whether for work, gaming, or entertainment purposes.
Whether you choose to build your own or buy a pre-made adapter, the ability to connect legacy devices to modern USB-C displays can be a real game-changer. Happy building!


