Creating a DIY USB-C to HDMI cable can be an exciting project, but understanding the technical challenges and device compatibility is essential.
As USB-C and HDMI become staples of modern technology, the idea of creating a DIY USB-C to HDMI cable is an intriguing prospect for tech enthusiasts. While this concept is appealing, understanding whether such cables can work universally with all devices is critical before embarking on this journey.
A. What Are USB-C and HDMI?
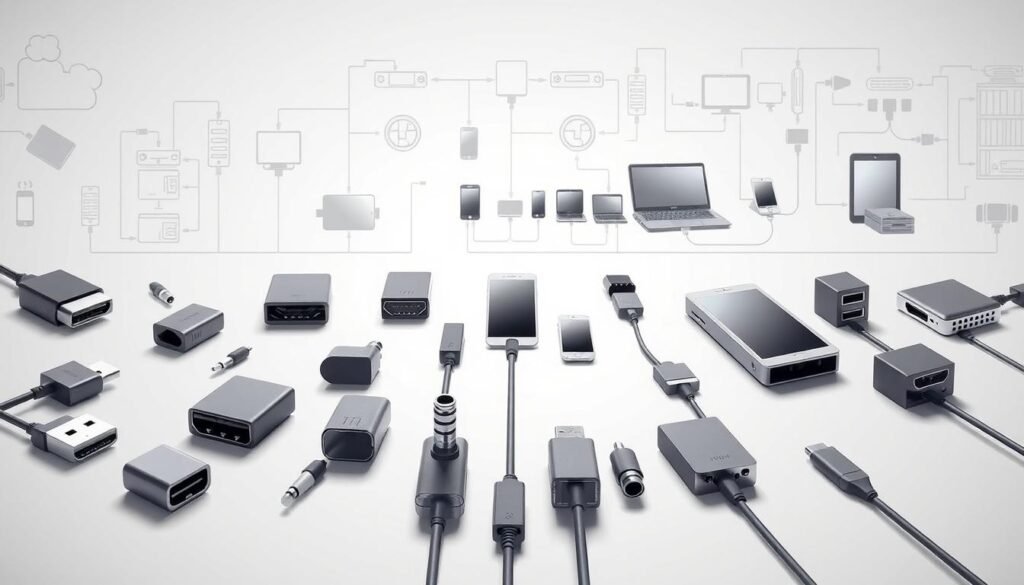
USB-C and HDMI are two pivotal standards that drive connectivity in modern devices, each offering unique capabilities:
- USB-C: Renowned for its versatility, USB-C is a compact, reversible connector that supports a wide array of functionalities. It handles data transfer, video output, and power delivery with impressive efficiency. USB-C’s ability to transmit video is enabled through protocols like DisplayPort Alt Mode or HDMI Alt Mode, making it a favored choice for connecting to external displays. Found on laptops, smartphones, tablets, and peripherals, USB-C has rapidly become the go-to port for modern tech.
- HDMI: HDMI (High-Definition Multimedia Interface) is the gold standard for transmitting high-quality audio and video signals. It is ubiquitous in home theaters, gaming systems, and professional setups, providing support for resolutions up to 8K and advanced audio formats like Dolby Atmos. HDMI’s widespread adoption makes it a cornerstone of modern multimedia experiences.
The convergence of these two technologies is essential for enabling seamless connections between portable devices and external displays. However, the inherent differences in their signal transmission protocols necessitate the use of converters, adapters, or cables designed to bridge the gap effectively. Understanding these distinctions lays the groundwork for evaluating the feasibility of DIY USB-C to HDMI cables.
B. The Concept of DIY USB-C to HDMI Cables
Creating a DIY USB-C to HDMI cable involves designing a custom solution that bridges the two interfaces without relying on pre-made adapters. This approach appeals to tech enthusiasts who are eager to explore innovative ways to connect devices while saving costs or achieving specific customizations.
Why Build a DIY Cable?
- Cost Efficiency: DIY projects can be a budget-friendly alternative to purchasing premium cables or adapters, especially for users who already have spare components.
- Customization: Building your own cable allows for precise tailoring of cable length, durability, or additional features based on your requirements.
- Educational Experience: Crafting a cable provides hands-on knowledge of the technical intricacies of USB-C and HDMI, empowering users with deeper insights into how these technologies operate.
Key Considerations for DIY Cables:
- Signal Conversion: USB-C and HDMI use fundamentally different protocols for transmitting data. USB-C requires Alt Mode (DisplayPort or HDMI) to send video signals, while HDMI devices expect signals formatted for direct video and audio output. A chipset is often necessary to convert these signals effectively.
- Pin Mapping: Each connector’s pins serve distinct purposes, from data transfer to power delivery. Properly aligning these pins is crucial to creating a functional cable.
- Material Quality: High-quality wires, connectors, and soldering materials are essential to ensure durability and optimal signal transmission.
While the concept of DIY USB-C to HDMI cables is intriguing, the challenges involved in signal conversion and compatibility mean that these solutions are not universally applicable. Exploring these limitations further highlights the practicality of such endeavors for various users.
C. Compatibility Challenges with DIY USB-C to HDMI Cables
The idea of a DIY USB-C to HDMI cable functioning universally across all devices is highly appealing, but compatibility hurdles can significantly impact its effectiveness. These challenges stem from the fundamental differences in how USB-C and HDMI handle data and signals:
- Device Support Variability: Not all USB-C devices support video output. For a USB-C port to transmit video, it must support DisplayPort Alt Mode or HDMI Alt Mode. Devices lacking this capability cannot transmit video signals, making a DIY cable ineffective in such cases.
- Signal Conversion Requirements: HDMI devices require specific signal formats that USB-C cannot provide directly. This necessitates a chipset within the cable to convert the USB-C signal into an HDMI-compatible format. DIY cables without this component will fail to function properly.
- Resolution and Refresh Rate Limitations: Even when a DIY cable successfully connects, achieving high resolutions and refresh rates (e.g., 4K at 60Hz) requires adequate bandwidth. If the USB-C port or cable materials do not meet these bandwidth demands, video quality may suffer.
- Power Supply and Bandwidth Mismatch: HDMI devices often demand more power than what a USB-C port can supply, particularly for high-performance displays. A lack of adequate power can lead to unstable connections or device malfunctions.
- Driver and Firmware Dependencies: Some devices require specific drivers or firmware updates to enable video output via USB-C. Without the appropriate software, even a well-constructed DIY cable might not work.
- Durability and Longevity: DIY cables may not have the same build quality as professionally manufactured ones, leading to potential wear and tear that can further impact compatibility and performance over time.
These compatibility challenges highlight the complexity of creating a universal DIY USB-C to HDMI cable. While the concept is feasible in specific scenarios, understanding these limitations ensures realistic expectations and informed decision-making for DIY enthusiasts.
D. Benefits and Drawbacks of DIY USB-C to HDMI Cables
Benefits:
- Cost Savings: Building a DIY cable can be significantly cheaper than purchasing high-end pre-made adapters, especially for tech enthusiasts who already have access to tools and materials. This can be a cost-effective option for non-critical or experimental setups.
- Custom Solutions: DIY projects allow users to create custom cable lengths and configurations tailored to specific needs. This can be particularly useful for unique setups, such as embedded systems or compact workspaces, where standard cables may not suffice.
- Learning Experience: Attempting to build a USB-C to HDMI cable offers valuable hands-on experience in understanding signal protocols, pin mapping, and the technical nuances of these interfaces. This can deepen one’s knowledge of electronics and connectivity standards.
Drawbacks:
- Complexity: Crafting a functional USB-C to HDMI cable is a highly technical process requiring an in-depth understanding of both USB-C and HDMI protocols. Signal conversion alone presents significant challenges, often necessitating a specialized chipset.
- Limited Compatibility: Even a well-built DIY cable may not work across all devices due to differences in hardware capabilities, signal requirements, and firmware dependencies. This makes the outcome unpredictable in many scenarios.
- Risk of Damage: Incorrect wiring or improper signal conversion can potentially damage connected devices, particularly if voltage or power requirements are mismatched. This risk underscores the importance of caution and precision.
- Time Investment: The time required to research, design, and assemble a DIY cable may outweigh the benefits, particularly when pre-made adapters are readily available and reliable.
- No Guarantees: Unlike commercial adapters, which come with warranties and customer support, DIY solutions offer no such safety net. Failures or defects must be resolved independently.
By weighing these benefits and drawbacks, users can better determine whether a DIY USB-C to HDMI cable aligns with their needs and technical expertise.
E. Are Pre-Made Adapters a Better Option?
While the DIY approach has its merits, pre-made USB-C to HDMI adapters often prove to be a more practical choice for the majority of users. Here’s why:
- Plug-and-Play Simplicity: Pre-made adapters are designed for ease of use, requiring no technical expertise. They offer plug-and-play functionality, eliminating the need for signal conversion troubleshooting or pin mapping.
- Guaranteed Compatibility: Manufacturers design these adapters to meet industry standards, ensuring broad compatibility across a wide range of devices and resolutions. This significantly reduces the trial-and-error process associated with DIY solutions.
- Integrated Chipsets: High-quality pre-made adapters include integrated chipsets capable of handling complex signal conversion. This ensures reliable performance for transmitting high-resolution video and audio, even for demanding setups like 4K displays.
- Time-Saving Solution: For users who need immediate results, pre-made adapters save the time and effort involved in researching, sourcing materials, and constructing a DIY cable.
- Enhanced Safety and Durability: Professionally manufactured adapters undergo rigorous testing to ensure safety and reliability. They are built with durable materials, reducing the risk of wear and tear compared to DIY alternatives.
- Support and Warranty: Pre-made adapters often come with warranties and customer support, offering peace of mind in case of defects or compatibility issues. This level of assurance is not available with DIY solutions.
For most users, the reliability, convenience, and broader compatibility of pre-made USB-C to HDMI adapters outweigh the potential benefits of a DIY approach. While DIY projects may appeal to enthusiasts, pre-made options remain the preferred choice for hassle-free connectivity in professional and personal environments.
F. Key Takeaways for DIY Enthusiasts
Embarking on a DIY USB-C to HDMI cable project can be an exciting and educational journey, but it requires careful consideration of technical challenges and realistic expectations. Here are the key points to keep in mind:
- Understand Your Devices: Research whether your USB-C device supports video output through DisplayPort Alt Mode or HDMI Alt Mode. This compatibility is crucial for your cable to function properly.
- Invest in Quality Components: Use high-grade wires, connectors, and chipsets designed for signal conversion to ensure durability and functionality. Avoid compromising on materials, as this could affect performance and safety.
- Prepare for Signal Conversion: A chipset is essential for converting USB-C signals to HDMI. Without it, your DIY cable will not work with most devices. Study the pin mapping and transmission protocols thoroughly.
- Test Safely: Begin testing with non-critical or inexpensive devices to minimize the risk of damage during initial trials. Use a multimeter or similar tools to verify connections before use.
- Expect Limitations: A DIY cable might not support advanced features like 4K resolution at 60Hz or multi-channel audio. Accept these trade-offs unless you are equipped to design for such capabilities.
- Time and Effort Considerations: Building a DIY USB-C to HDMI cable is time-intensive. Evaluate whether the time spent outweighs the cost of purchasing a reliable pre-made adapter.
- Be Ready for Trial and Error: DIY projects often involve iterations and adjustments. Patience and persistence are essential for success.
Balancing Creativity with Practicality
DIY USB-C to HDMI cables can be a fascinating venture for those with technical expertise and a passion for hands-on projects. However, they are far from universal solutions due to the inherent complexities of signal conversion, compatibility limitations, and the risks of potential device damage. For general users, pre-made adapters provide a safer, more reliable, and time-efficient alternative. Yet, for tech-savvy enthusiasts willing to invest time and effort, embarking on a DIY project offers a unique learning experience and the satisfaction of crafting a custom solution. Whether you opt for DIY or a pre-made option, understanding the technology behind USB-C to HDMI connections ensures you make informed decisions.